Showing posts with label bracelet. Show all posts

Tuesday, August 21, 2012

Craft #9-- Thread & Chain Bracelet

Another Bracelet DIY!


Basic idea: thread, weave, or knot some pretty colored string onto a chain to make a bracelet.

You'll need a chain, some string, ribbon or embroidery floss (what I used), a clasp, and your trusty big ol' needle.

I got the idea for this one from pins like this and this, originally intending for it to look more like the latter, so it started out like the picture below, but I changed my mind- thinking it would look better if it were wider, so I took it apart and started over.

I got a piece of chain that was twice as wide as my wrist, and picked out the center link, to be the clasp. Next, I got a nice long piece of embroidery thread, and tied it in the middle, so it doubled up, to the center link of the chain.

Then I started knotting the thread.  I used a technique I learned when I was in elementary school, making clip-in hair wraps (I was super cool), and you also use it when you make friendship bracelets. I've heard it referred to as a 4 knot, since it looks like a number 4. (here're instructions in the friendship-bracelet form) It's essentially just knotting one strand around another.  Here, I used the needle to pull the embroidery floss through a link, creating the knot, first on one side, then the other, back and forth. (If you want to see bigger pictures, just click on them.)


 While you're going, it looks like this:
 I fit about five or six knots on each link, then I moved on to the next one until I got to the end, and I tied on a clasp (didn't have one the exact color as the chain, annoyingly.)  That's it!


 Et Voila! I love it!


 Questions, comments, let me know! :)

Monday, July 2, 2012

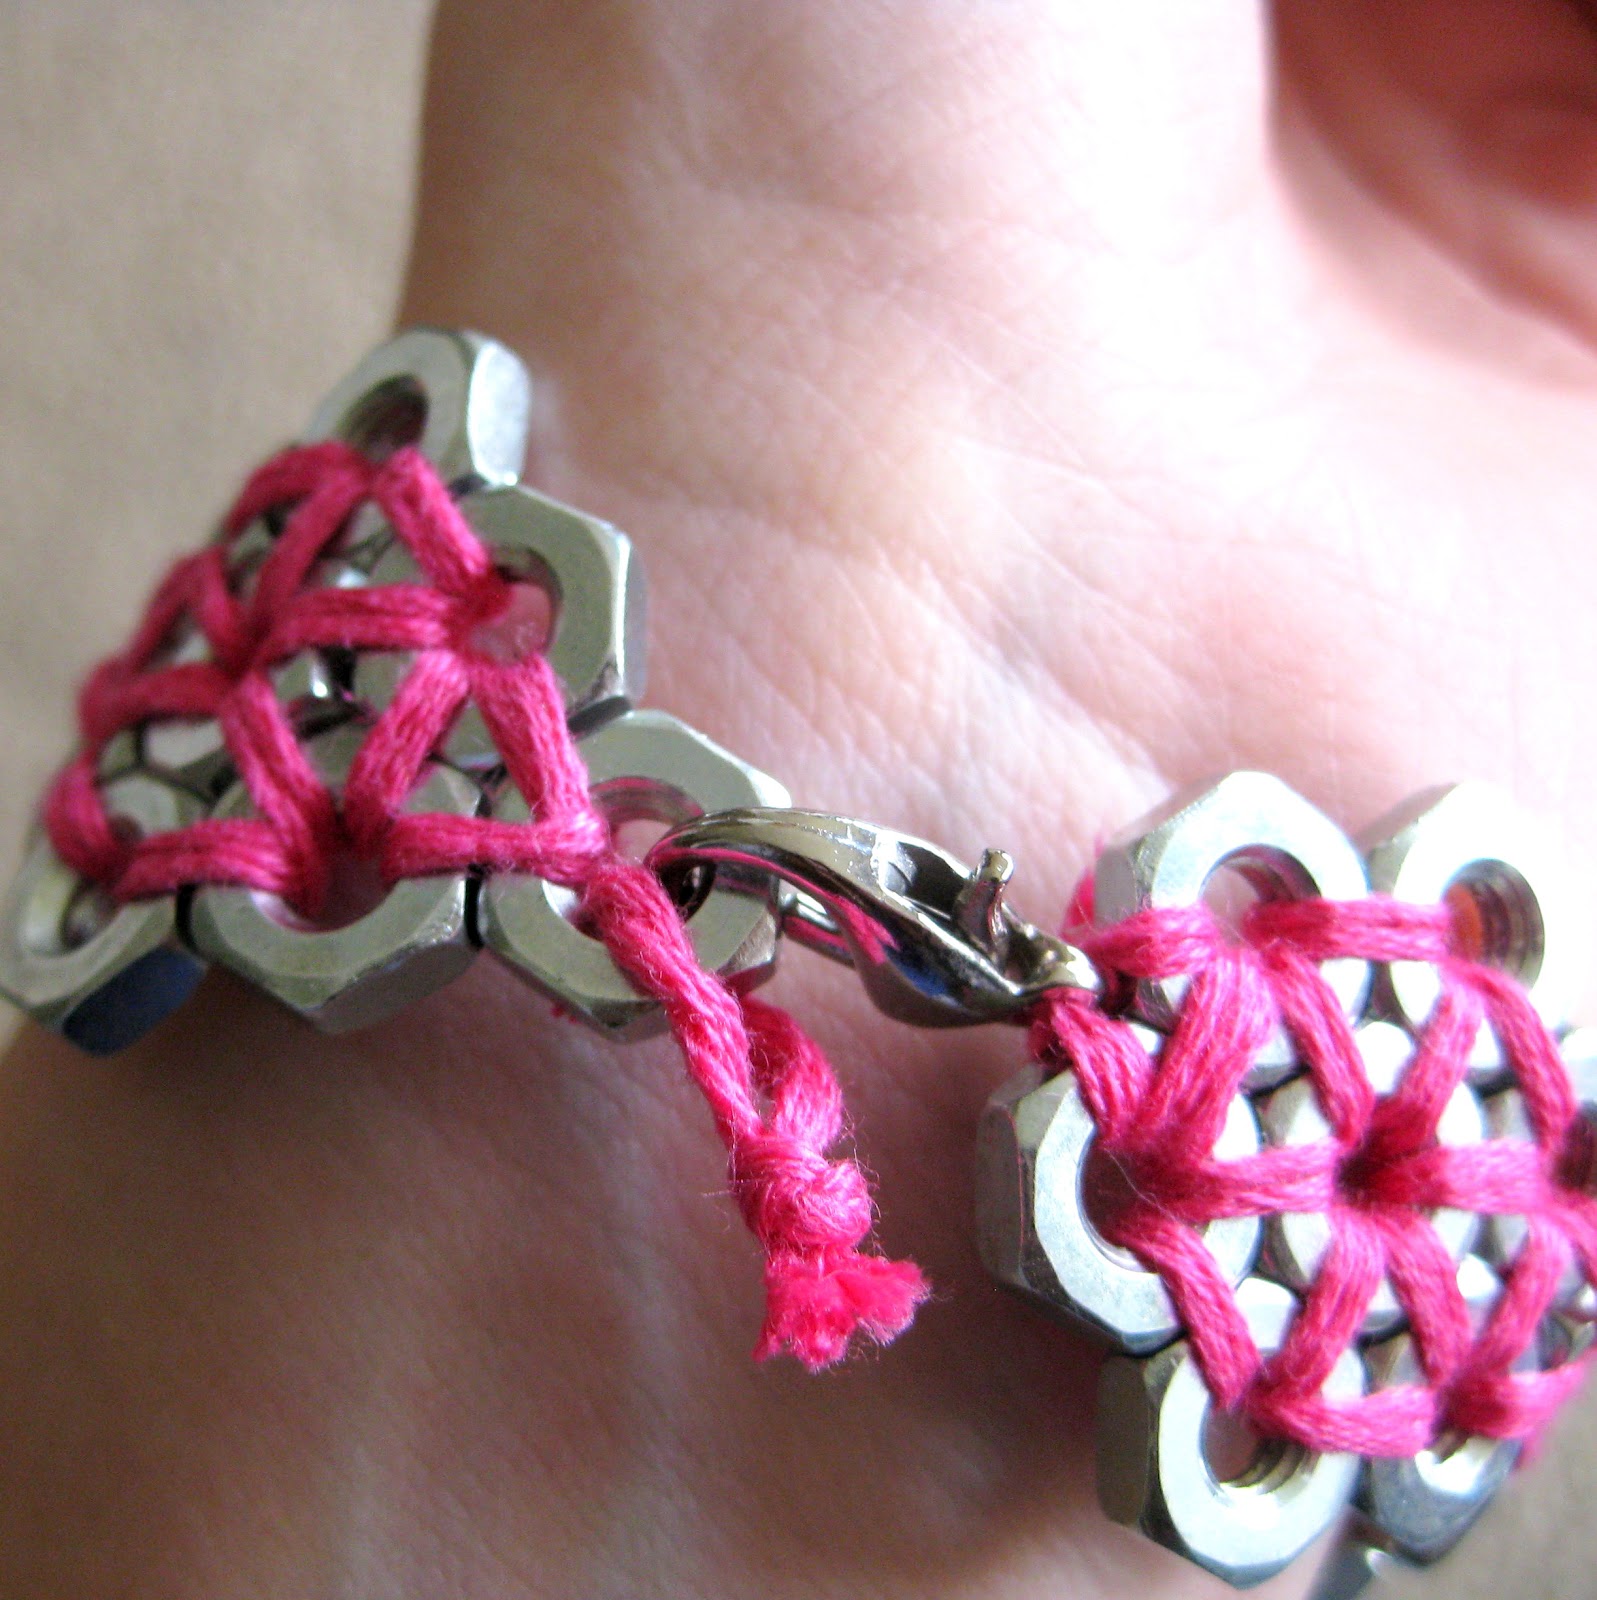
Craft #7 (the last!) Hex Nut Bracelet

It's been a while since my last post! I spent the last month dealing with end of school, finals, and spending time with my family. But now it's summer (though it's only 65 degrees outside here) and I will hopefully have time to be crafty!
I have been snoozing (an extension you can get if you use Google Chrome) this page, an Etsy store ad for a "Steampunk" Hex Nut Bracelet for a month or more. I don't remember now where I found it, but I decided I could totally make it myself, especially since I still had hex nuts leftover from my other bracelets! 
Basic idea: string the flat sides of the hex nuts together to make a bracelet!
I used embroidery floss and 40 hex nuts, assisted by my big ol' needle.  My first step was to arrange the hex nuts in the pattern, just so I had an idea of where I was going to be threading them together. I ended up not doing it that way--in three rows-- but it was useful to start out with.
I tied the end of the string (I cut about two arm lengths to start out with) around one of the hex nuts, and wrapped it twice around another one--flat ends together. Then I continued, lashing the hex nuts together, flat side-to-flat side, wrapped twice with the thread, adding as I went.
(If you need a bigger and better view of the pictures, click on them!)

 I decided at this point that I didn't want to continue as in the Etsy post, and instead make it a little smaller and more feminine. (Since, obviously, the pink wasn't girly enough.)
So I kept plodding along, adding in my little pattern. (Scroll back up to the top to look at it!) Where I only have it connected by one hex nut, in order to keep the bracelet from being too wobbly, I discovered that it was best to attach it on two sides, rather than just one. Make triangles! 
I needed to add more string as I went, so I just tied it on, trimmed the ends later, and threw some clear nail polish on the knots.
Last step was to add the clasp, which I debated about how to do for a while, but I ended up just stringing it on with the embroidery floss. My clasp was big enough that I could hook it on to the last hex nut, but it was a little hard to unhook. So I just threaded a loop of floss through.

And there we go! I'm pretty happy with it, and I might even go to the hardware store and pick up more hex nuts. Of the three bracelets that I've made, this one's my favorite!

Questions, comments-- let me know :)

Tuesday, April 17, 2012

Craft #4 Hex Nut Bracelet-- Wrapped

Here's Hex Nut Bracelet part 2!
I got the idea here (as always, if you click on the picture, it will lead you to the original post).  She used washers and made a necklace, but those washers are big-- statement-necklace sized, and I have all these smaller, bracelet-sized hex nuts. You use what you've got! and it works! (most of the time!)
Basic idea: wrap a bunch of hex nuts in embroidery floss/string, lace them together, and make it a bracelet.

I used hex nuts, obviously, embroidery floss from my parents' house (we used them for making hair wraps when I was little, so we had a lot), and a big ol' needle to make wrapping easier. 


 In the original post, she superglued the loose end to the washer. When I was doing it, I hadn't actually read all of her instructions, and I left a tail on mine. You can do it either way, but I was happy with mine because it gave me something more than just the little nut to hold on to, and it ended up being how I tied them together at the end.
I didn't need a whole lot of thread to wrap it, maybe about an arms length, which left enough of a tail for me to use them to make the ties later.  


Holding the loose end and the hex nut in one hand, I threaded the needle around, doing one full loop and then going back and covering all the gaps, which were usually around one of the points of the hexagon. By the time I was done, they looked much more like donuts than hexagons.


Once I had pretty much all the metal covered, I knotted off the ends, but left the excess on.
Repeat!
Before I connected my little donuts together, I laid them out so I knew in what pattern I would be tying them. In my first bracelet (the pinks) I used the thread of the previous hex nut to attach it to the following one. For the blue and purple bracelet, though, I worked from the outside in, blue to purple to blue to light blue, so that the middle purple was attached to both the light blues. If that confused you, look back at the picture at the top of the post, you should be able to see what I'm trying to describe!
 To link them, I threaded the needle onto the longest tail of the preceding hex nut, and looped it around the following one twice, then knotted it securely with the short tail. I looped it only once on my first bracelet, but I wanted it to be more secure on the second one.
 Once I had them all tied together, I cut off all the tails and used the long ones to make the ties on the bracelet.  If your ends are too short or you want specific colors for your ties, just cut more embroidery floss. I needed mine about seven inches or so. Now, there are options here. You can just knot them on to one of the hex nuts, you can use a jump ring, or you can do what I did.
First, I threaded four lengths onto a needle.
 Here's the tricky part. With the needle in the middle of the thread, I pulled it about halfway through the hex nut on the end. Then I flipped the needle back through the hex nut and carefully wiggled it back out with my finger in the loop, keeping it intact.
 After I had successfully maintained my loop, I pulled the loose ends through, finishing off with a knot at the end and a snip to make my ends even.

And there you go! another creative way to use hardware store leftovers.

Questions, comments, suggestions, clarification? anything? 
Leave me a comment and let me know!

Friday, April 13, 2012

Craft #3 Hex Nut Bracelet-- Braided

Bonjour!

I have two bracelets for you, both involving the same materials!
This past winter, before I had succumbed to Pinterest, I found this tutorial for a DIY braided hex nut bracelet, which I promptly made.  I bought a whole little box of hex nuts, so they've been sitting around my apartment since then.  I've tried things with them here and there, but now I'm officially out to use them up!
So here is bracelet #1-- The Super Cool Hex Nut Bracelet

Basic idea:  thread a hex nut (or bead) onto your strands as you braid


I started out with some string that I pilfered from my parents' house, and to make it more interesting I added a strand of the blue thread that I got for the Easter egg project. It ended up sneaking in and out of the braid and added a nice touch.

I cut three long strands of the string, knotted an end and taped it to the table for an anchor, and braided several inches.  It might be best to judge how far in you want to start the hex nuts for yourself (I have fairly skinny wrists).  It just needs to be long enough that you can tie the ends together!
For your planning purposes: on my bracelet, 10 hex nuts is about an inch, I used 16, and it's centered nicely on my wrist.


So now you need to start adding the hex nuts. Let's say you have just put the right strand over to the middle and you're about to do the left side. First, thread the hex nut on and let it slide and nestle up to the braid, then bring that strand over to the middle.


Next you do the same to the right side. Thread the hex nut on, nestle it, bring the strand to the middle.  It's just basic braiding with an addition.
I wasn't able to get super great pictures of this part (I need to start doing projects when my roommates are home so they can help me!) so if you get confused, the original DIY has a great series of pics to help!


Since I already made a basic bracelet, I wanted something different, so I decided to make it loop around my wrist twice. After I braided the first 16 hex nuts on, I stopped adding and just continued braiding until I had gone far enough that it brought me back to the top of my wrist. Then started braiding in the hex nuts again, but twice as many as the first one.  Then was a tail for knotting , et voila!
As an added bonus/if you want to get really fancy, does anyone remember these bad boys? How the ends are knotted around the string so you can slide the bracelet looser and tighter? Fun fact: Google says those are slide knots, and after some trial and error, I made one around the middle! Because the hex nuts are so heavy, it was a little hard to get everything situated so I could tie the ends myself.  This way, I can slide it loose, put it on, tighten it, and tie the other end.  Next time I would give myself extra, extra room on the ends so that I could do slide knots on both ends, to be exactly like those 80s/90s bracelets.
So there we go! Hex nut use #1, #2 to follow soon!

If you have any questions, comments, suggestions, or really anything you want to say, leave me a comment! 
I would love to know what you're thinking! :)