Sunday, May 19, 2013

The long-awaited (I know, I know!) #10-- Sharpie Mug

So, it's been a long time. I won't bore you with all the reasons that I let this go unattended, but I have done some crafties between then and now, I just haven't posted anything.
But!
I'm really excited about these:
Sharpie Mugs!
Basic Idea:
Get some paint-based markers and draw on mugs! Woo!

You'll need some mugs (I got mine at the dollar store!) and some paint pens.
I tried it first as you see it online, with just normal Sharpies, (like this) but it didn't stand up to a good washing, unfortunately. So I got some Sharpie oil-based paint markers (these are the ones I bought, but I got them at a craft store... I think. Might have been Fred Meyer, though.). They come in lots of colors, according to the internet, so you should be able to do whatever designs you can dream up! :)

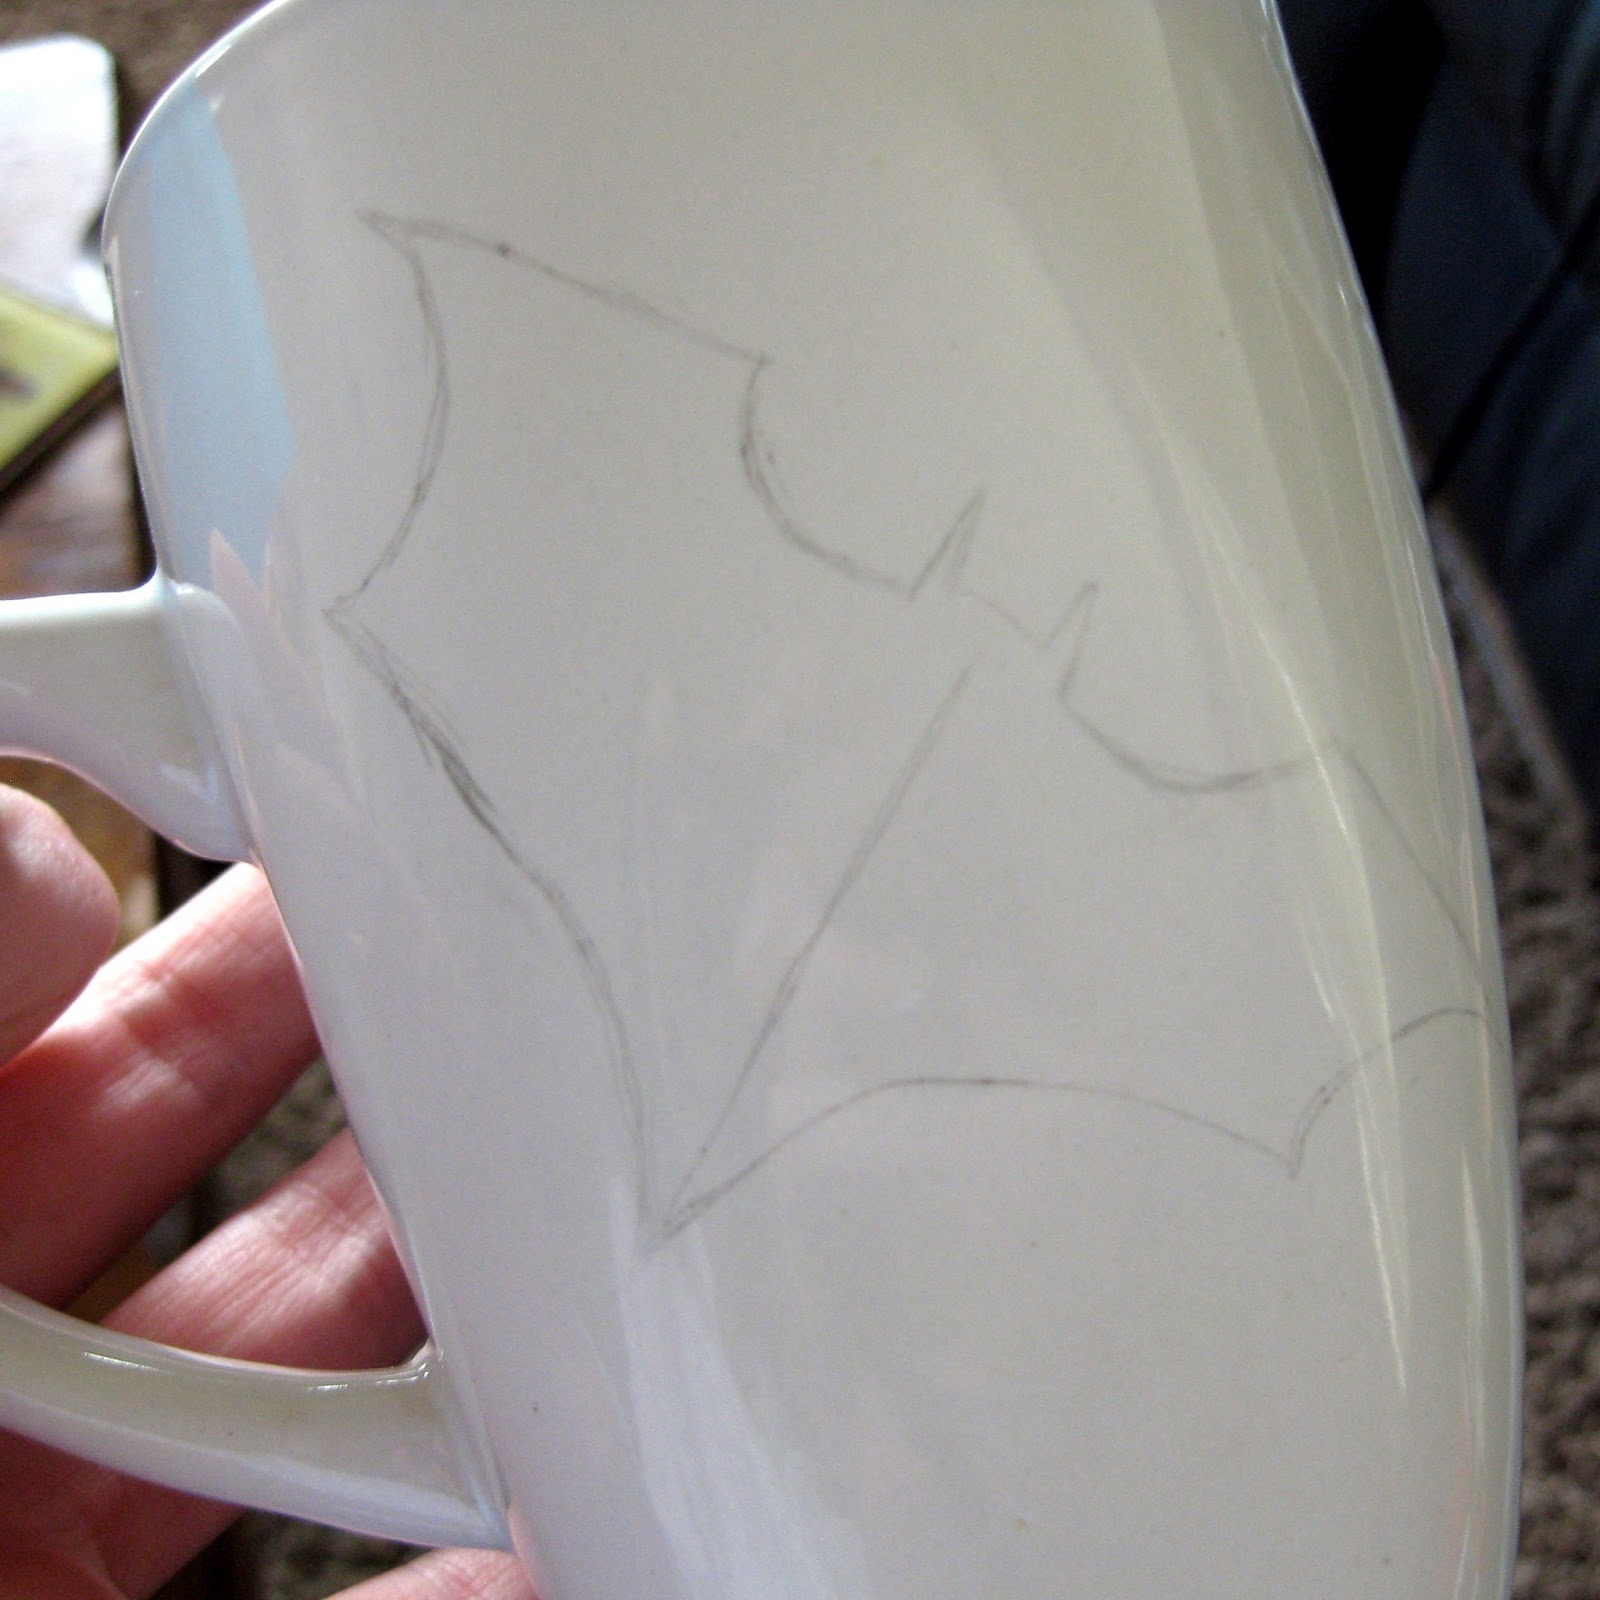
My first mug was a Batman mug, for my boyfriend. I found a good picture of the logo online, which I then traced and cut out as a stencil. With a pencil, I traced the design onto the mug. Pencil worked out perfectly, because it rubbed right off the surface-- didn't even need an eraser!
Once I was happy with the design, I outlined it with the pen, and started coloring it in...


Pretty straightforward, huh? and so cool!
If you mess up with the paint, a Q-tip with nail polish remover, or even a cotton ball, if you want to wipe everything off, will do the trick. you might need two, though-- one smears it around, and the other will wipe up the leftover color.


I got a little more abstract and free-handed the mug I gave my roommate:


I stole (because it was so cute!) the idea for one I gave my little sister (the Harry Potter one in the middle) from this website, which is also where I got the baking instructions, though I did double check them against several other websites, just for good measure.

So once you're done drawing, put the mugs on a cookie sheet and pop it all in the oven, then turn it on at 350 for half an hour, letting the mugs preheat and cool down in the oven.
The Batman and Harry Potter mugs I baked at my parents' house, and the colors stayed pretty true, but the ones below I baked in the oven in my apartment, and the colors got a little deeper, which is fine, they look great, but something to maybe just be aware of.

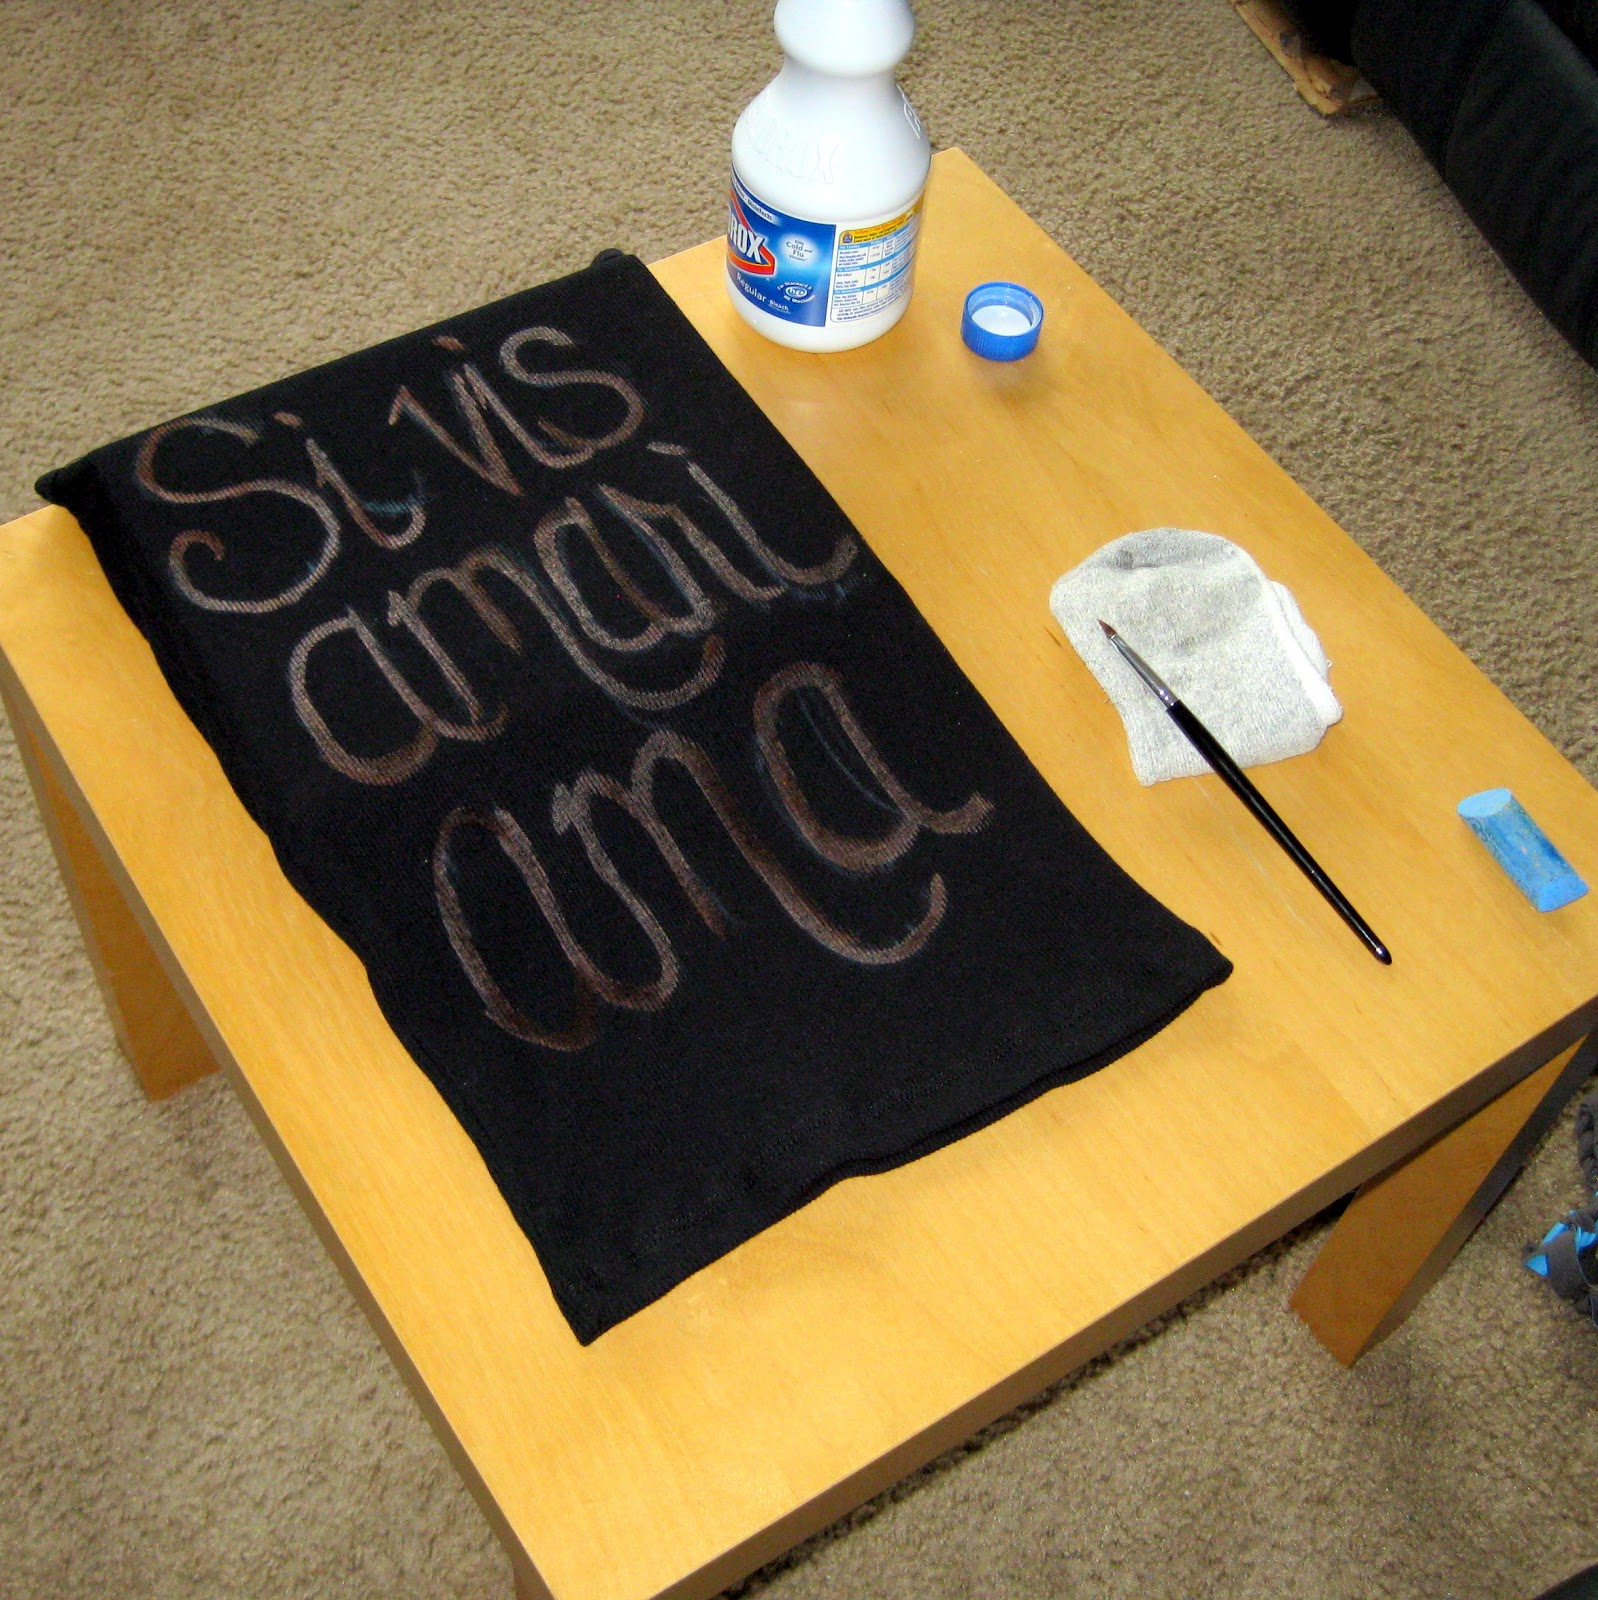
This is round 2-- the mugs I'm keeping! :)  My language nerdiness got the best of me.


"La vie est faite de petits bonheurs" 


If you have any questions let me know!

Tuesday, August 21, 2012

Craft #9-- Thread & Chain Bracelet

Another Bracelet DIY!


Basic idea: thread, weave, or knot some pretty colored string onto a chain to make a bracelet.

You'll need a chain, some string, ribbon or embroidery floss (what I used), a clasp, and your trusty big ol' needle.

I got the idea for this one from pins like this and this, originally intending for it to look more like the latter, so it started out like the picture below, but I changed my mind- thinking it would look better if it were wider, so I took it apart and started over.

I got a piece of chain that was twice as wide as my wrist, and picked out the center link, to be the clasp. Next, I got a nice long piece of embroidery thread, and tied it in the middle, so it doubled up, to the center link of the chain.

Then I started knotting the thread.  I used a technique I learned when I was in elementary school, making clip-in hair wraps (I was super cool), and you also use it when you make friendship bracelets. I've heard it referred to as a 4 knot, since it looks like a number 4. (here're instructions in the friendship-bracelet form) It's essentially just knotting one strand around another.  Here, I used the needle to pull the embroidery floss through a link, creating the knot, first on one side, then the other, back and forth. (If you want to see bigger pictures, just click on them.)


 While you're going, it looks like this:
 I fit about five or six knots on each link, then I moved on to the next one until I got to the end, and I tied on a clasp (didn't have one the exact color as the chain, annoyingly.)  That's it!


 Et Voila! I love it!


 Questions, comments, let me know! :)

Monday, August 13, 2012

Craft #8-- Beaded and Braided Necklace

And a month later, I have another post! And a couple more crafts all done and ready to go. They're all jewelry, so August's posts are going to have a theme to them :)
First up:  beads and braids.
This isn't the actual post that first inspired me, but for whatever reason, I didn't pin the original, and I've seen this one around, same idea, so it'll do.

Basic idea: string a bunch of strands of beads together, and then braid them.

I forgot to take a picture of my materials beforehand, but you can see them in the pictures.  Gold beads, black thread and ribbon, black jump rings, and some gold rings that I found in my craft stash from a long time ago.  I also used this handy-dandy thing:
It's a bead threader! My mom and I went to Michael's craft store, and I found it in the bead section. I knew I wanted to make this necklace, but stringing all the beads myself would pretty much give me arthritis.  You thread the really skinny hooked needle, spin the bowl, and then the hook catches the beads as they spin around. This one was $15, and if you don't want to spin it yourself, they have a battery powered one that spins on it's own.

It was so fast! and fun! I'm definitely going to be making more beaded things for a while.
So anyway, I made 16 strands, one end tied onto a black jump ring. They ended up not being all the same length, so after struggling fix it after I'd braided (didn't work), I took the extra beads off, regrouped them into 4 groups of four, and tied the ends to the gold rings.
Next step was braiding.
I like to be cool and different, so it was definitely going to be a four-strand braid. I took some pictures in a feeble attempt at a how-to for the braid, but this diagram is much better. The braid also looks really cool in your hair. :)


 Once the braid was done, I caught the gold rings onto the black one, and tied extra knots, just to be sure, securing them with clear nail polish.  Adding the ribbon and tying a bow were the last steps, and there we go.
(If you need the pictures to be bigger, just click on them!


 It turned out really well, I'm super happy. :)


Monday, July 2, 2012

Craft #7 (the last!) Hex Nut Bracelet

It's been a while since my last post! I spent the last month dealing with end of school, finals, and spending time with my family. But now it's summer (though it's only 65 degrees outside here) and I will hopefully have time to be crafty!
I have been snoozing (an extension you can get if you use Google Chrome) this page, an Etsy store ad for a "Steampunk" Hex Nut Bracelet for a month or more. I don't remember now where I found it, but I decided I could totally make it myself, especially since I still had hex nuts leftover from my other bracelets! 
Basic idea: string the flat sides of the hex nuts together to make a bracelet!
I used embroidery floss and 40 hex nuts, assisted by my big ol' needle.  My first step was to arrange the hex nuts in the pattern, just so I had an idea of where I was going to be threading them together. I ended up not doing it that way--in three rows-- but it was useful to start out with.
I tied the end of the string (I cut about two arm lengths to start out with) around one of the hex nuts, and wrapped it twice around another one--flat ends together. Then I continued, lashing the hex nuts together, flat side-to-flat side, wrapped twice with the thread, adding as I went.
(If you need a bigger and better view of the pictures, click on them!)

 I decided at this point that I didn't want to continue as in the Etsy post, and instead make it a little smaller and more feminine. (Since, obviously, the pink wasn't girly enough.)
So I kept plodding along, adding in my little pattern. (Scroll back up to the top to look at it!) Where I only have it connected by one hex nut, in order to keep the bracelet from being too wobbly, I discovered that it was best to attach it on two sides, rather than just one. Make triangles! 
I needed to add more string as I went, so I just tied it on, trimmed the ends later, and threw some clear nail polish on the knots.
Last step was to add the clasp, which I debated about how to do for a while, but I ended up just stringing it on with the embroidery floss. My clasp was big enough that I could hook it on to the last hex nut, but it was a little hard to unhook. So I just threaded a loop of floss through.

And there we go! I'm pretty happy with it, and I might even go to the hardware store and pick up more hex nuts. Of the three bracelets that I've made, this one's my favorite!

Questions, comments-- let me know :)

Friday, May 18, 2012

Craft #6 -- Bleached tee

I'm nearing the end of my quarter, and I'm so ready for summer.  Hopefully I'll be able to steal my sister's sewing machine and make some of the bigger projects on my board! In the meantime, I'm doing lots of powerpoints and catching up on all of the season finales!

On to my project! I actually finished it a week ago, and have just been putting things off.  It did take me a while to do, however.  In Attempt #1 I used a shirt from JC Penny's that I got for $2. Unfortunately I didn't pay attention to the details in the instructions (click on the picture to see the whole tutorial!).  It was mostly polyester, which I found out is pretty colorfast. Since I couldn't see any color coming up, I kept putting more bleach on and it ate through the shirt! Too bad, since I liked the style of Attempt #1's shirt better than Attempt #2's tank. Ah well. It turned out well in the end.


Basic idea: bleach a design on a shirt! Sorta like reverse tie-dying.
You'll need (non-color safe) bleach, chalk to draw your design with, a synthetic bristle'd paint brush (if you use brushes with real hair bristles they dissolve in the bleach. Again, I didn't read the instructions until afterwards). I used an old sock to catch drips and rest my brushes on,  and of course, you need a cotton shirt. Seriously. Cotton.
You'll also need something to stop the bleach from going onto the back of the shirt. I used a cardboard box the first time, and a telephone book the second time, but I hear you can use a white and/or old towel.

Once you've got that all set up, sketch your design on the shirt with your chalk. If you mess up or change your mind, no worries, the chalk will wash out.

Side note about my quote:
I'm a language nerd. I took a year of Latin my freshman year of college, loved it, and this became one of my very favorite quotes.
 "Si vis amari, ama" is from Annaeus Seneca, a Roman philosopher.  It means "If you wish to be loved, love."

Once you have your design all settled, start painting! It's pretty incredible how fast the color comes out.  As you can see in my finished pictures, I ended up with parts more red and parts more white. I like it, but you can go back over with more bleach if you want it to be more even. 


Just to show you the difference between a cotton shirt and my Attempt #1 shirt which was polyester-- you can already see the red/white color on the 'S', while I'd bleached the entire quote on the pink shirt and it just looks damp. 
I recommend getting a smooth shirt versus a ribbed one, though, because I could paint more smoothly on the pink shirt versus the tank. I also had more room, so I like the way most of it looked on the pink shirt versus the black. 

And here's the cotton after I'd done the whole design:


Once I was happy with the design, I let it sit in the window light, since the instructions say to put it in the sun.  After that I hand washed it, just in case. I didn't want to throw it in a full load and have something go wrong and get bleach on all my clothes!  I did throw it in the dryer, and then the next time I did a load of laundry I threw it in.
I'm pretty happy with the way it turned out, but I do want to do it again on a more flow-y shirt. 


There you go, another surprisingly easy project!  Questions or comments let me know. :)


Sunday, May 6, 2012

Just got this color, 'Coral Reef', and wanted to share! Sometimes it seems more orange-y and sometimes more pink-y, but it's the perfect color for spring. and I threw some sparkles on a couple tips just for fun!


Thursday, May 3, 2012

Craft #5-- String wrapped bottles

School has been keeping me busy lately!  So between that and a failed attempt at my next craft, I haven't gotten to post lately. So here's a simple, pretty, and actually fairly quick project for a weekend, or just any afternoon!  I actually had to go and find the pin, I didn't realize that I hadn't actually pinned it myself-- just seen it on my friends' boards. So here is the link to the pin I decided I liked best, but I didn't actually follow their directions. So, here's my version!

Basic idea: wrap a bottle in string. (A lot of my crafts seem to revolve around wrapping things)
I had these little mini glass wine bottles laying around because I thought they would make a really cute something-or-other, and then I used the same blue crochet thread from my other projects-- I had no idea it would come in this handy--and I used white glue, because it was what I had, but if you plan on using these for vases, it might be better to pick something a little less water-soluble.

I didn't peel the label off of my first bottle, thinking that I would just wrap the string really close together and you wouldn't be able to see it.  From far away you can't really tell, but from close up you can see the colors, especially the metallic, so I did peel what I could off of the second bottle, but I didn't spend too much time on it since I was still going to cover it up.
I put a dab of glue where I wanted my string to start, and smooshed it around where I wanted to start wrapping the string so there was a nice thin coating. I didn't want to end up with glue-coated string like from when I made the Easter eggs, but if that is indeed what you're going for, that could be cool too, and check out the craft!

Next step was to wind the string!
I wanted it to be nice and tight and pretty, and the best technique I found was to move the bottle rather than the string. I added more glue as I went along down the bottle, so that it didn't dry before I got there, and so that I had something not-gluey to hold.
I stopped wrapping a little bit before the bottom, just because, and smeared a nice dollop of glue onto it.
And there you go, all done! Easy peasy, you probably have everything in your house already, and it only took me about one episode of Bones to make them, so you have no excuse not to go find some bright spring-y colors and make your mom a trio of vases for Mother's Day! :) 

Questions or comments, let me know!